Agents
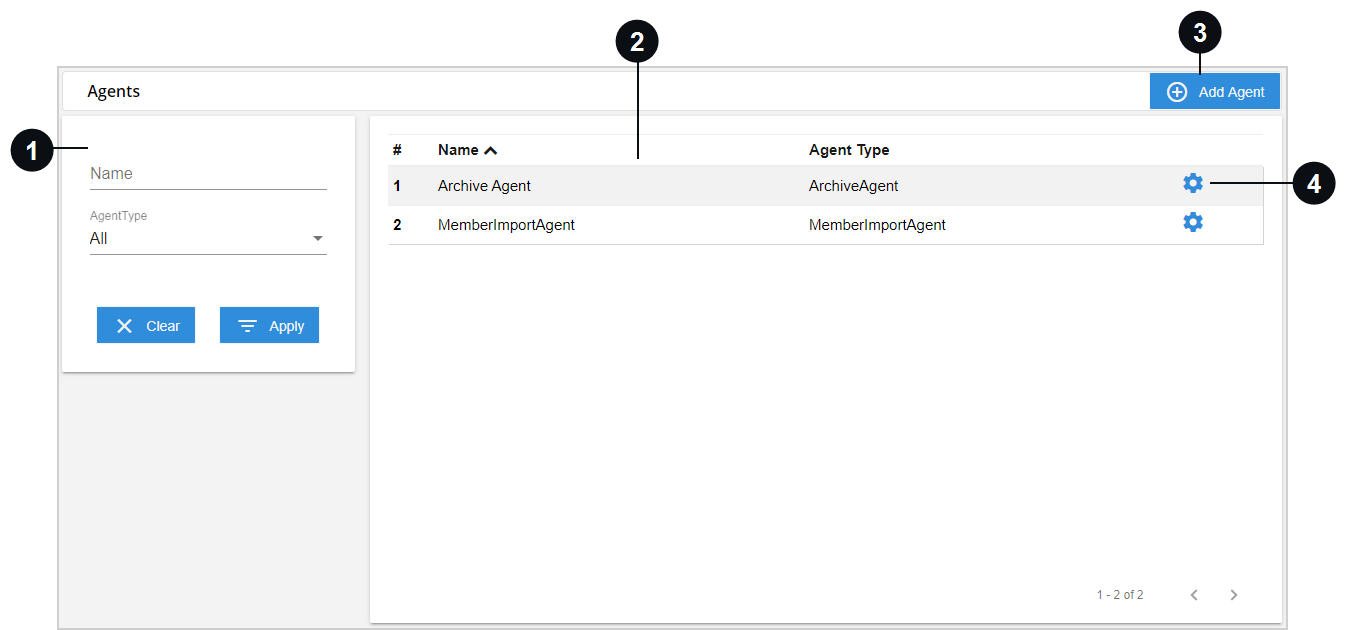
Server agents (Windows services) are required to run on the financial institution's servers for specific functions: archiving, importing member or account information, and using a Verifast device for signing (if applicable). Once an agent is installed, it is displayed on the Agents page. On the Admin Dashboard page, click Agents, or click Administration > Agents from the menu to open the Agents page. One or more agents may not be applicable to your environment. For general agent installation, configuration, and troubleshooting inquiries, refer to the eReceipts Agent Guide.
There are three agents that you can utilize with eReceipts:
-
Archive Agent: The Archive Agent downloads the archived documents to the financial institution's imaging system. Depending on your imaging system configuration, an index file will be generated.
-
Member Import Agent / Account Import Agent: The Member Import Agent or Account Import Agent imports the consumer's contact information from a CSV file into the eReceipts system so that the information is accessible to tellers while processing transactions. This prevents tellers from having to manually enter consumer information repeatedly.
Note: Depending on your type of institution, you will see "Member Import Agent " or "Account Import Agent" used in the portal. "Member Import Agent" will be used throughout this documentation except where noted. "Member" will be used for "member" and "account" throughout this documentation except where noted.
-
Verifast Agent: The Verifast Agent allows you to use a Verifast tablet for signing. Refer to Configuring Verifast Devices for details about installing, configuring, and using Verifast tablets. This agent may not be applicable to you.


|
Search | Filter the list of agents based on the search criteria here. |

|
List of Agents | All of the agents that meet the search criteria are listed here. Click an agent's row to view the Edit Agent window where you can edit the agent name and type. |

|
Add Agent | Click Add Agent to add an agent. |

|
Edit Log Settings | Click the gear  icon next to an agent to view and edit the log settings for that agent in the Edit Log Settings window. icon next to an agent to view and edit the log settings for that agent in the Edit Log Settings window. |
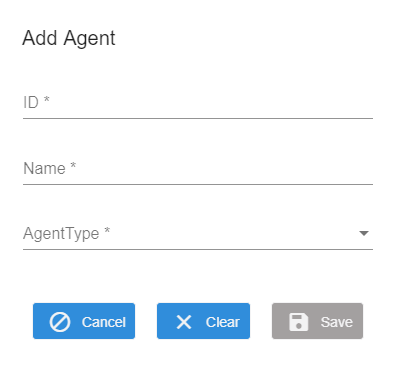
Click Add Agent to add an agent. The Add Agent window is displayed. Enter information in the fields and click Save. Click Cancel to exit the Add Agent window without adding an agent. Click Clear to clear the values in all of the fields.
-
ID: Enter the Application (client) ID for the agent from Microsoft Azure Active Directory. If the ID is incorrect, you will get an error message.
-
Name: Enter the name of the agent. The name can be alphanumeric and includes dashes (-) and spaces. The entry must be at least 3 characters (minimum) and no more than 25 characters (maximum).
-
Agent Type: From the dropdown, select the type of agent that is applicable: Archive Agent, Member Import Agent / Account Import Agent, or Verifast Agent.

In the search panel, filter the list of agents based on the search criteria here:
-
Name: Enter the name of an agent.
-
Agent Type: Select a type of agent from the dropdown menu. Select All to view all agents.
Click Clear to clear any values entered in the Name field and revert the Agent Type selection back to All. Click Apply to search for the agents based on the search criteria.
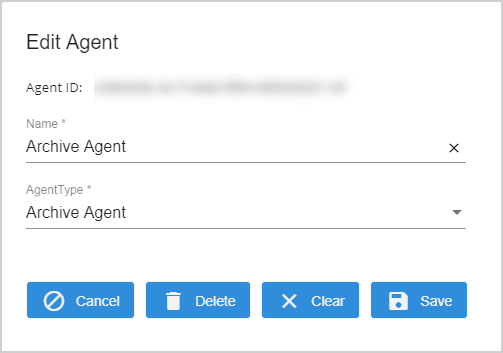
All of the agents that meet the search criteria are listed on the Agents page. Click an agent's row to view the Edit Agent window where you can edit the agent name and type. Click Cancel to exit the Edit Agent window without saving changes. Click Delete to delete the agent. Click Clear to clear any values in the Name and Agent Type fields. Click Save to save any changes and exit the Edit Agent window.

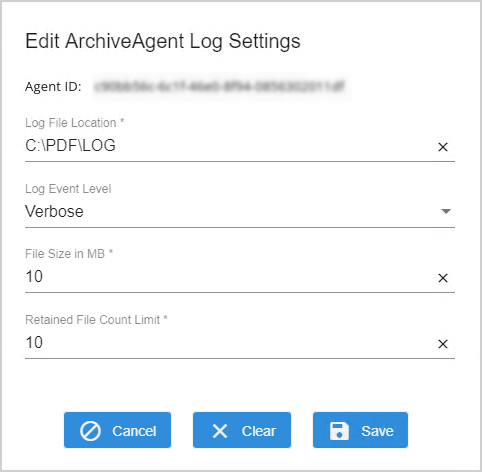
Click the gear  icon next to an agent to view and edit the log settings for that agent in the Edit Log Settings window. Click Save to save any changes to the log settings. Click Cancel to exit the Edit Log Settings window without saving any changes. Click Clear to clear all of the values in all of the fields.
-
Log File Location: This is the default path of the log. It is recommended to keep the default log location (%installpath%/logs) so that all of the logs are in the same location. UNC paths are supported; however, any agent startup logs will be in %installpath%/logs.
-
Log Event Level: There are two log event levels: Information and Verbose. Information is the default selection. For a more detailed log, select Verbose.
-
File Size in MB: This is size of each log file in megabytes (MB). The minimum size is 1 MB. The maximum size is 10 MB.
-
Retained File Count Limit: This is the number of log files maintained. The minimum is 1. The maximum is 10.
