Using the Teller Portal
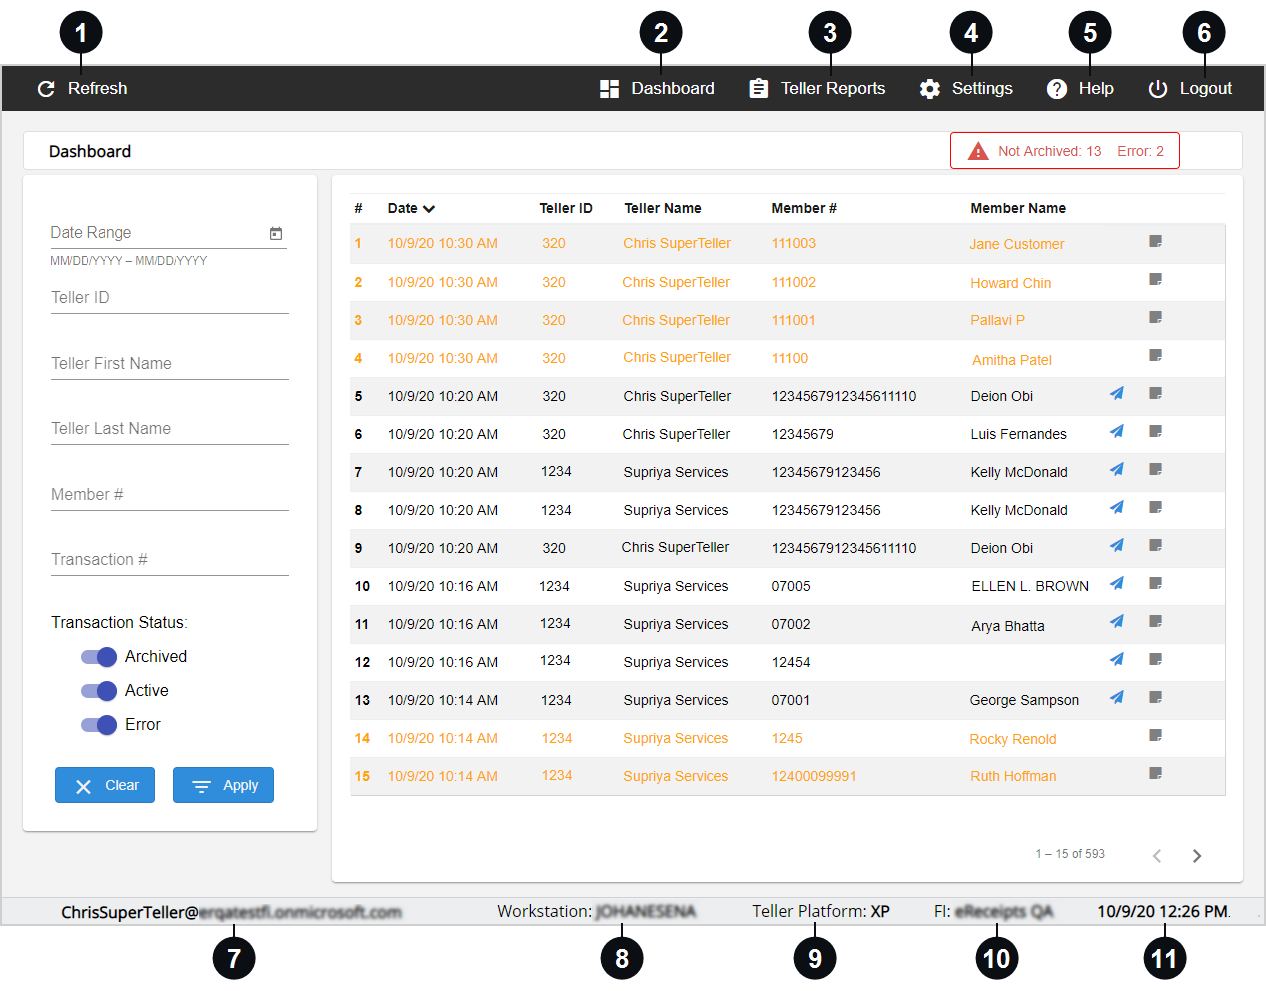
The Teller Portal is the user interface for performing all tasks associated with day-to-day transactions. When the eReceipts Client is launched for the first time, the Teller Portal opens to the Dashboard page. The Teller Portal launches whenever a receipt is generated if the eReceipts Client is running on the workstation. When a receipt is generated, the Teller Portal opens to the transaction page. A user must be assigned to the Teller or Super Teller role to have access to the eReceipts Client and Teller Portal.
Note: Depending on your environment, you may see the term "account" used instead of "member." The examples in this documentation use the term "member" except where noted.


|
Refresh | Click Refresh to reload the contents of the current page. |

|
Dashboard | Click the Dashboard menu item to navigate to the Dashboard page. Refer to Dashboard for details. |

|
Teller Reports | Click the Teller Reports menu item to navigate to the Teller Reports page. Refer to Teller Reports for details. |

|
Settings | Click the Settings menu item to open the Settings window. Refer to Settings for details. |

|
Help |
Click Help to choose from the Restart, Documentation, and About sub-menu items. Refer to Help Menu for details.
|

|
Logout | Click Logout to log out and exit eReceipts Client, Teller Portal, and Admin Portal. Refer to Signing In to eReceipts for details about signing in. |

|
User ID | Your user ID is displayed here. |

|
Workstation ID | This is the name of your workstation. |

|
Teller Platform | The core host is displayed here. |

|
FI | This is the financial institution (FI). |

|
Date and Time | The current date and time is displayed here. |