Offline Transactions
If your host/core system becomes unavailable, the Offline Transaction feature lets you record transaction data and continue processing transactions using the Teller Portal. When the host/core becomes available again, the data is automatically entered into the system and the consumer's account is updated. For offline transactions, the member or account numbers are automatically prefixed with "OFFLINE-" to designate them from other transactions. The PDF/XML name in the imaging system will be prefixed with "OFFLINE" as well.
Workstations must have network/Internet access for this feature. Offline transactions may not be applicable to your installation.
Note: Depending on your environment, you may see the term "account" used instead of "member." The examples in this documentation use the term "member" except where noted.
Click ![]() Offline Transaction on the eReceipts Client system tray menu to display the Offline Transactions page. Refer to Using eReceipts Client for details about the eReceipts Client system tray icon.
Offline Transaction on the eReceipts Client system tray menu to display the Offline Transactions page. Refer to Using eReceipts Client for details about the eReceipts Client system tray icon.
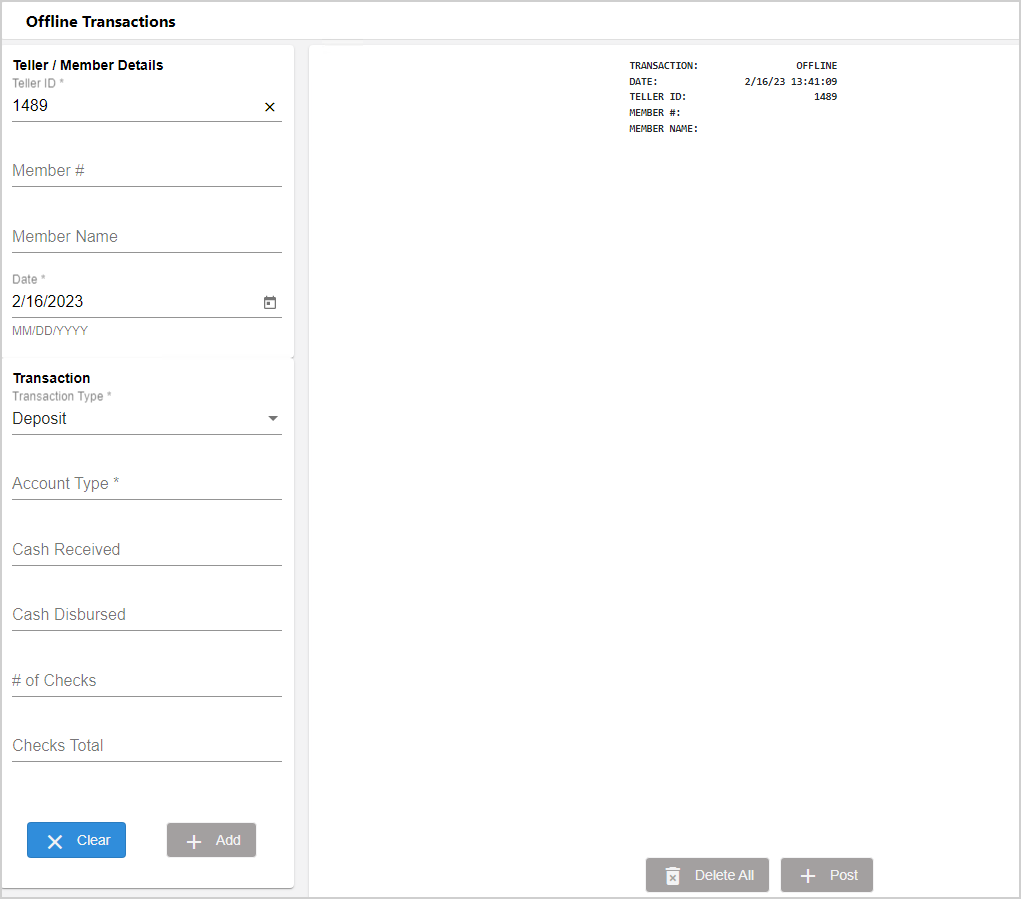
On the Offline Transactions page, the left pane is for entering data about the transaction. The middle of the page displays the offline transaction data. The following example of the Offline Transactions page has no transactions added yet.
This is an example of the Offline Transactions page with two transactions added for a consumer.
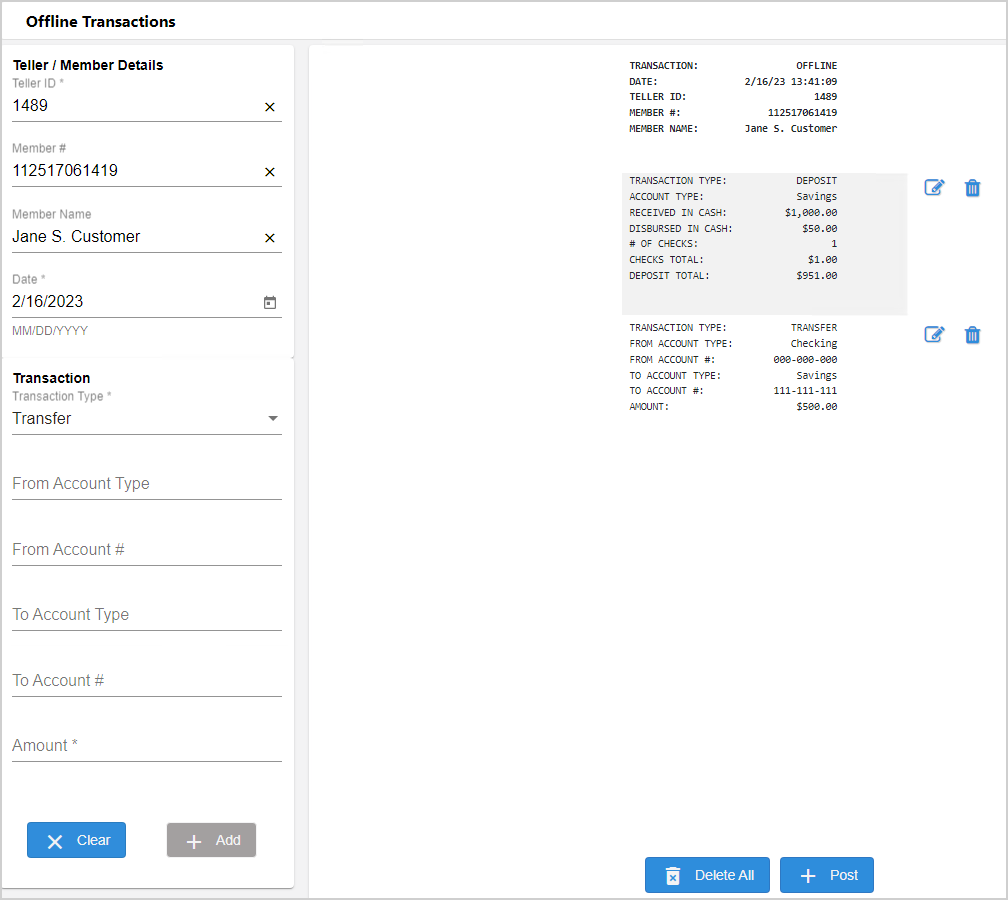
Enter transaction data in the left panel. Only data for one transaction can be entered at a time. Click Add to create the transaction. The transaction will be displayed in the middle of the page. An unlimited number of transactions can be added to the Offline Transactions page for each consumer. Click Clear to clear the transaction data in all fields except Teller ID and Transaction Type.
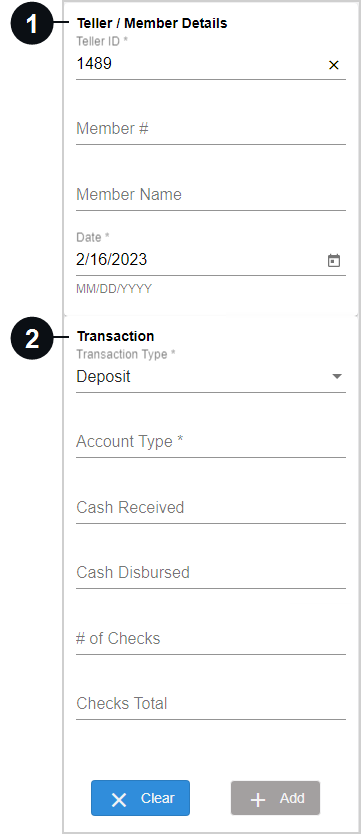

|
Teller / Member Details or Teller / Account Details | Enter the consumer's account number and name. The Teller ID field (required) is automatically populated if the teller ID is available. The top of the transaction panel is automatically updated based on the Teller ID, Member # / Account #, and Member Name / Account Name fields in the Teller / Member Details or Teller / Account Details area. Set the date of the transaction up to 7 days in advance of the current date using the Date field. The current date is automatically populated by default. |

|
Transaction | Enter information about the transaction. The Transaction Type field is required. Select Deposit (default), Withdrawal, Transfer, Payment, or Other. The other transaction fields change depending on the selected transaction type.
|
After a transaction has been added to the Offline Transactions page, you can edit the data by clicking the Edit  icon.
icon.
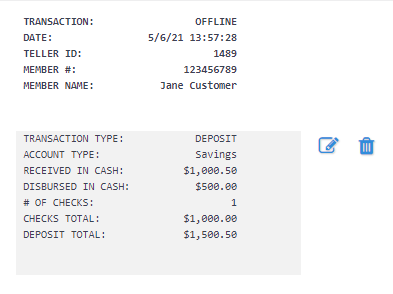
The Edit Transaction window is displayed. Modify data as needed. Click Save to update the transaction and return to the Offline Transactions page. Click Cancel to return to the Offline Transactions page without saving changes to the transaction.

After one or more transactions have been added to the Offline Transactions page, you can delete individual transactions by clicking the Delete ![]() icon associated with the transaction. To delete all transactions, click Delete All.
icon associated with the transaction. To delete all transactions, click Delete All.
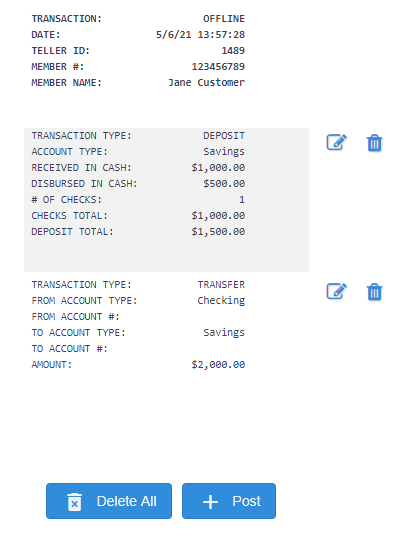
From the Offline Transactions page, click Post. The transaction page is displayed. Perform all actions related to the transaction here. Refer to Transactions for details about processing a transaction. For offline transactions, the member or account number is prefixed with "OFFLINE-".
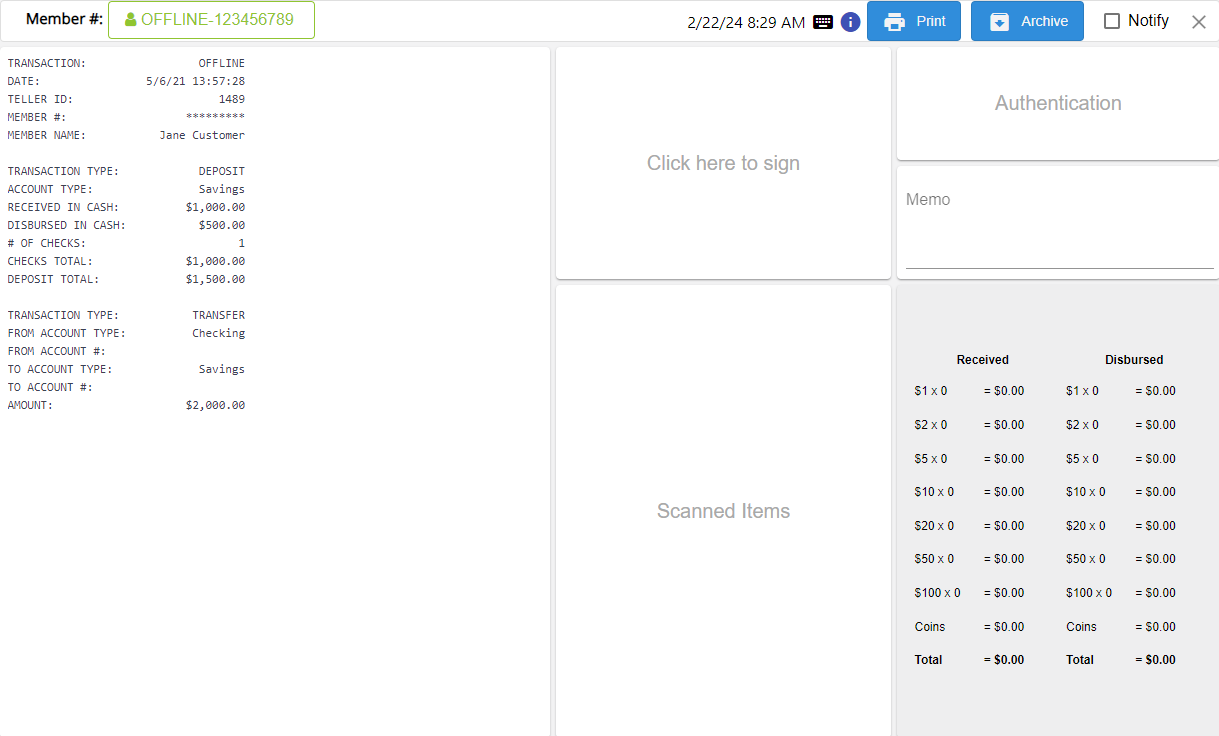
Review the offline transaction on the Dashboard page. Refer to Dashboard for details.
