System Settings
The System Settings page is used to view and configure eReceipts system defaults. On the Admin Dashboard page, click System Settings to open the System Settings page with the Email tab selected. From the menu, you can click Administration > System Settings and then select the sub-menu item that corresponds to a tab on the System Settings page: Email, Text, Remote Sign, Workstation Port, Time Zone, Purge, IP Filter, Subscriptions.
On the System Settings page, click Revert to Default to change the value in a field to the default value where applicable. If the Revert to Default button is disabled, then the value in the field is already set to the default value.
From the Email tab, set the default email settings and templates for email notifications to your customers. Click Reset to cancel any changes made in the section without saving. Click Save to save changes.


|
From | Enter a name. This will be the name of the sender (e.g., your financial institution's name) in the email notification that your customer will receive. |

|
From Email | Enter the email address of the sender. This will be the sender's email address in the email notification that your customer will receive. This field is required. |

|
Subject | Enter the subject line of the email that your customer will receive. This field is required. Up to 60 characters are supported. |

|
Receipt Message | Enter the email message that your customer will receive. {FullName} and {ReceiptImage} are required. In the email notification, {FullName} will be replaced with the recipient's full name, and {ReceiptImage} will be replaced with an image of the receipt. This field is required. Up to 1,000 characters are supported. |
Refer to the following example of an email notification sent to your customer based on the settings applied in the Email tab.

From the Text tab, set the default text message that your customer will receive for text message notifications in the Receipt Message field. Up to 200 characters are supported in the Receipt Message field. {FullName}, {ReceiptImage}, and {TextReceiptExpiryDaysMessage} are required and will be replaced with the following information:
-
{FullName} will be replaced with the full name of the recipient.
-
{ReceiptImage} will be replaced with a link to the image of the receipt.
-
{TextReceiptExpiryDaysMessage} will be replaced with this sentence: "This link will expire in ___ days." The number of days is set in the Receipt Link Expiration (Days) field. The default is 7 days. The number of days must be between 1 (minimum) and 45 (maximum). If a customer tries to open the {ReceiptImage} link after it expires, the customer will receive a 404 Page Not Found error message instead of an image of the receipt.
Text message notifications are an optional, paid feature. This feature may not be applicable to you.

Refer to the following example of a text message notification sent to your customer based on the settings applied in the Text tab.

From the Remote Sign tab, set the text message that your customer will receive when signing a receipt via text message (remotely). eReceiptsPlus is an optional, paid feature. This feature may not be applicable to you. Refer to Get Signatures for details about the teller and customer experience.

|
|
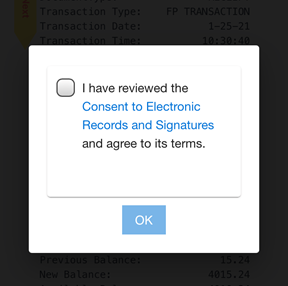
Consent URL | Enter the URL of your financial institution's Consent to Electronic Records and Signatures webpage. The signer reviews the Consent to Electronic Records and Signatures webpage and agrees to the terms before the signer reviews and signs the receipt. The following image is an example of the message that is displayed to the signer. When the signer taps Consent to Electronic Records and Signatures, the signer is navigated to the consent URL (e.g., http://www.hometownfinancial.com/remotesign).
Note: If a URL is not entered in the Consent URL field, the signer will see this message next to the checkbox: " I consent to sign the receipt electronically." |
|
|
Remote Message | Enter the text message that your customer will receive when signing a receipt via text message. In this example, {FinancialInstitution} Remote Sign. is the text that is entered in the Remote Message field. {FinancialInstitution} is replaced with the name of the financial institution, which is Hometown Financial in this example. The additional directions and the signing URL are automatically added to the end of your message. Up to 200 characters are supported.
|

From the Workstation Port tab, set the printer port for all unmapped workstations in the institution. The default value is 9101. The eReceipts Client checks if there is a port assigned to a workstation. If no port is assigned (unmapped), then the value in the Printer Port field is used. If you do not want to use the default printer port number on specific workstations, you will have to update the workstations individually. To map workstation ports to individual workstations, refer to Workstation Ports.

From the Time Zone tab, set the default system time zone based on your location using the dropdown menu. You must configure this setting before using eReceipts. The default is blank. Transactions, archives, audits, and reports are impacted by this setting.

From the Purge tab, configure Retain Archived Transactions (Days). Successfully archived transactions and transactions that failed to archive are kept in the system for the number of days specified here. After the number of days has passed, the transactions are deleted (purged) from the system. The minimum number of days is 7. The maximum number of days is 90 (default).

Note: When a transaction fails to archive, the "error" transaction is backed up to an error folder in the archiving location ("archive path") that was configured on the Archive Agent server. Transactions can be retrieved and reviewed from the error folder.
Note: Active transactions and transactions that are deliberately not sent to an imaging system will not be deleted based on the Retain Archived Transactions (Days) setting.
Note: Transaction logs are deleted every 180 days. Refer to Logs for details about searching for and viewing transaction logs.
Use the IP Filter settings to control the IP traffic that can access the eReceipts Client and Teller Portal. IP Filtering is disabled by default. When IP Filtering is disabled, any IP address can access eReceipts. When IP Filtering is enabled, users will be denied access to eReceipts if their IP address is not on the IP Filter List. If the user's IP address is on the IP Filter List, the eReceipts API will connect to eReceipts and the user will be authorized to access the eReceipts Client and Teller Portal. Users assigned to administrative roles will not be denied access to eReceipts based on the IP Filter settings.

To add an address or range to the IP Filter List, click Add. In the Add IP Address or Range window, enter an IP address (e.g., 172.100.11.0) or a range of IP addresses (e.g., 172.100.11.0 - 172.100.11.50), and then enter a description. Click Save to add the IP address or range to the IP Filter List. Click Cancel to exit the window without saving changes. Click Clear to delete any entered values.

After an IP address or range is added to the IP Filter List, edit the entry by clicking on the row in the IP Filter List. Make changes as needed. Click Save to update the IP address or range on the IP Filter List. Click Cancel to exit the window without saving changes. Click Clear to delete any entered values.

After an IP address or range is added to the IP Filter List, delete the IP address or range by clicking the Delete  icon next to the entry.
From the Subscriptions tab, view your eReceipts subscriptions and their expiration date.
