Get Signatures
Capture customer signatures directly from the transaction page in the Teller Portal. Refer to Transactions for details about the transaction page. To manage the signature capture settings on a workstation, refer to Settings.
From the transaction page in the Teller Portal, click the Click here to sign card to start the signing process. The default signing method is automatically used.

Alternatively, hover over the Click here to sign card to display the Clear and Change Mode buttons.
")

|
Clear | After a signature is created, clear it from the transaction page by hovering over the Click here to sign card and clicking Clear. |

|
Change Mode | To select a signing method that is not the default signing method, hover over the Click here to sign card and click Change Mode. When the Change Mode button is clicked, a window is displayed. From this window, select the desired signing method from the available tabs and proceed with the signing process. This is an example of the window with the Touch signing method selected.
|
Signatures can be captured using a computer mouse, device pen, or finger (if the device supports touch). The touch signing method can be used for Topaz GemView and Wacom devices. If using a Topaz GemView or Wacom device in extended display mode, you have the ability to drag and drop the eReceipts Teller Portal back and forth between your primary monitor and the Topaz GemView or Wacom device that is being used by the customer to create a signature.
In the Teller Portal, click Click here to sign. If the touch signing method is not the default signing method, click the Touch tab. The customer uses a computer mouse, device pen, or finger (if the device supports touch) to sign in the window. Click Accept to save the signature. The Accept button is disabled until a signature is captured. Click Clear to clear the signature and try again. Click Cancel to exit the window without capturing a signature.

Note: Refer to Configuring Wacom Display Devices for details about installing, configuring, and troubleshooting Wacom display devices.
Note: If using the Topaz GemView Tablet Display, touch and tablet signing methods are supported. Before use, confirm that the GemView device is configured correctly for your environment. Refer to the applicable Topaz GemView user guide: www.topazsystems.com.
Note: If using the Topaz GemView Tablet Display when locking/unlocking a workstation or switching users, you may be required to drag and drop the eReceipts Tablet Portal onto the GemView device again before continuing.
Signatures can be captured using a device like an iPad or Topaz GemView Tablet Display.
Open the eReceipts Tablet Portal on the tablet device that will be used to capture the signature using this URL: https://tabletsign.immereceipts.com. You will be required to sign in using your Microsoft AD credentials once. Refer to Signing In to eReceipts for details.
In the Teller Portal, click Click here to sign if the tablet signing method is your default signing method. If the tablet signing method is not the default signing method, click the Tablet tab, and then click Start. Click Cancel to exit the window without capturing a signature.

The transaction is sent from the Teller Portal to the eReceipts Tablet Portal on the tablet device for signature capture. In the eReceipts Tablet Portal, the customer clicks Please Sign Here.

Then, the customer signs their name in the window. The customer clicks Accept to approve the signature, Clear to delete the signature and sign again, and Cancel to end the signature capture process without a signature.

Once the customer signs successfully and clicks Accept on the tablet device, the signature will be displayed in the Click here to sign card in the Teller Portal and a marketing image displays on the tablet depending on your configuration.
Note: If the signature is not captured before the tablet connection times out, the marketing message or logo will appear, and you must request the signature again from the Teller Portal.
Note: When the marketing image is updated, the browser cache and browsing history must be cleared prior to launching the eReceipts Tablet Portal.
Note: If using the Topaz GemView Tablet Display, touch and tablet signing methods are supported. Before use, confirm that the GemView device is configured correctly for your environment. Refer to the applicable Topaz GemView user guide: www.topazsystems.com.
Note: If using the Topaz GemView Tablet Display when locking/unlocking a workstation or switching users, you may be required to drag and drop the eReceipts Tablet Portal onto the GemView device again before continuing.
Signatures can be captured using a signature pad. If the signature pad signing method is not the default signing method, click Click here to sign, click the SigPad tab, and then click Start to display the IMM Sigpad App window. Click Cancel to exit the window without capturing a signature.

If the signature pad signing method is the default signing method, the IMM Sigpad App window will automatically appear when the Click here to sign card is clicked.

When the customer signs the signature pad, the IMM Sigpad App displays the signature in the signature window and includes a date and timestamp. For 4x5 and 5x7 signature pads, transactions can be displayed in the signature window as well. In the IMM Sigpad App window, click Clear to clear the signature, or click OK to accept the signature. After OK is clicked, the signature is displayed in the Click here to sign card on the transaction page in the Teller Portal.
Note: If the Display Transaction feature is enabled, the Show/Hide button is visible in the IMM Sigpad App window. When Hide is clicked, the transaction is hidden on the signature pad. If a signature is captured and Hide is clicked, the signature is cleared in the signature window. When Show is clicked, the transaction is shown on the signature pad. If a signature is captured and Show is clicked, the signature is cleared in the signature window.
Get eSignatures in real time from anywhere when you send digital receipts directly to your customer's mobile device via text message. eReceiptsPlus is an optional, paid feature and may not be applicable to your environment.
In the Teller Portal, click Click here to sign if the remote signing method is your default signing method. If the remote signing method is not the default signing method, click the Remote Sign tab. Enter the phone number of the customer if it is not automatically populated, and then click Send. The customer has 5 minutes to submit a signature. The customer views and signs the receipt from their phone. Once the customer signs, the signature is displayed in the Click here to sign card on the transaction page.

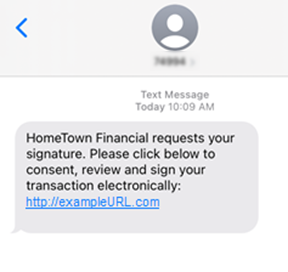
This is an example text message that the customer will receive. The customer taps the URL (e.g., http://exampleURL.com) to begin the signing process.
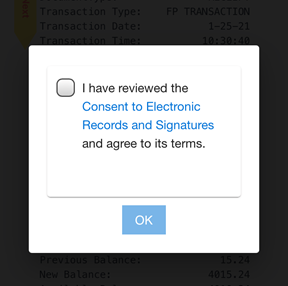
When the customer taps the URL (e.g., http://exampleURL.com), the consent window is displayed on their phone. If a "Consent to Electronic Records and Signatures" link is set up by the institution, the customer taps the Consent to Electronic Records and Signatures link to open and review the terms of electronic records and signatures. If a "Consent to Electronic Records and Signatures" link is not available, the message "I consent to sign the receipt electronically" is displayed without a link. The customer selects the checkbox and then taps OK.
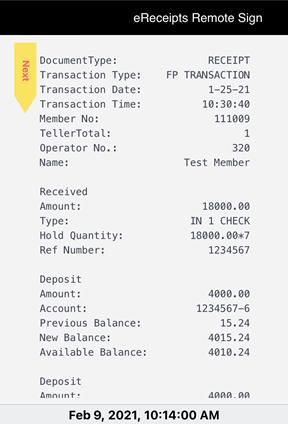
The receipt is displayed on the customer's phone. For longer receipts, the customer taps Next to navigate to the bottom of the receipt.
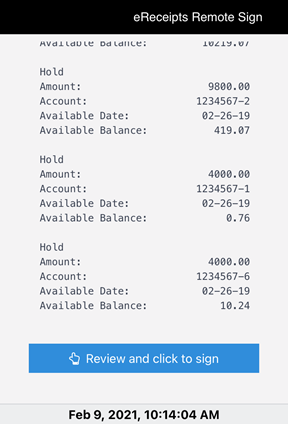
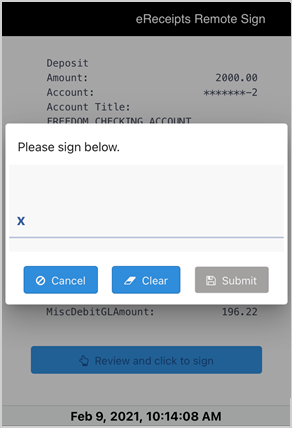
To sign, the customer taps Review and click to sign.
The customer creates a signature in the window and taps Submit to send the signature to eReceipts. Cancel ends the signing process without saving. Clear removes the signature so that the customer can sign again. The customer can tilt the phone to sign in portrait or landscape orientation as needed.
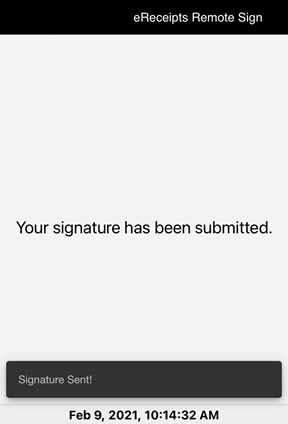
After the customer taps Submit, the customer's screen refreshes and displays a message to confirm that the signature was submitted. At the same time, the signature is displayed in the Click here to sign card on the transaction page of eReceipts.
Note: If a customer attempts to begin the signing process after the 5 minute time limit expires, a message is displayed that the transaction has expired and the customer is directed to call the financial institution.
Note: If the transaction was signed already and the customer taps the link again, a message is displayed on the screen stating that the transaction was already signed and submitted.
Note: If a customer attempts to access the link after 12 hours, the "Oops! Something went wrong." message is displayed.
Note: The examples shown in this section do not show a logo at the top of the eReceipts Remote Sign page. If a logo was configured by your administrator, that logo will be displayed at the top of the page. The top of the page will display the IMM eSign logo if no logo is available for the institution.
Note: The eReceipts Remote Sign link at the top of the screen opens the About window, which lists the eReceipts version number and copyright information. For more details, refer to Help Menu.
Verifast tablets can be used as a method of capturing in-person signatures at your financial institution. Before a transaction can be performed, the FI representative must sign in to the Verifast Tablet App on the Verifast device. Refer to Sign In to the Verifast Tablet App for details.
In the Teller Portal, click Click here to sign. If the remote signing method is not the default signing method, click the Verifast tab. With the Verifast tab selected, click Start.

When the transaction launches on the Verifast device, the customer reviews the receipt and taps the Review and click to sign button. In the signing window, the customer enters their signature. The customer taps Submit to accept the signature and approve the transaction. The Clear button clears the signature and lets the customer sign again. The Cancel button closes the signing window without saving a signature.
After the customer taps Submit, the “Click here to sign” message on the transaction page in eReceipts is replaced with the signature. The Verifast Tablet App refreshes and displays the Welcome page. This is an example of the Welcome page.
Note: For every transaction being signed using a Verifast device, eReceipts triggers a new instance of the Verifast Tablet App on the Verifast device. If the Verifast device is disconnected or if the transaction times out, the Verifast Tablet App refreshes and displays the Welcome page. In the Teller Portal, the message “Verifast Client Sign Session has timed out” is displayed. The FI representative must initiate the signing process again from the Teller Portal.
Note: Refer to Configuring Verifast Devices for details about installing, configuring, and using Verifast devices.